/
Service Levels
Service Levels
- Gord More (Unlicensed)
Owned by Gord More (Unlicensed)
Last updated: Oct 30, 2020
This article will explain how to use Rate Wizard's Service Level Screen.
Table of Contents
Open Service Level Section of the Rate Wizard
How to create a new Service Level
How to edit an existing Service Level
How to re-order Service Levels
How to delete a Service Level
Go back to the Rate Wizard Tutorial Main Screen
Go back to the IDS Core Tutorial Home Page
Open Service Level Section of the Rate Wizard
To navigate to the Service Level section of the Rate Wizard please do the following:
- Click on 'File' from the top of the screen.
- Then click on 'Rate Wizard' from the dropdown.
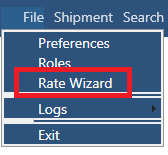
- Then click on "Service Level" on the left hand side of the screen

Creating a New Service Level
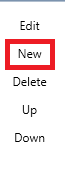
- Click the 'New' button located on the bottom left hand side of the screen.
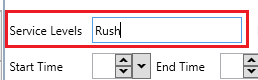
- In the "Service Levels" field type in the name for your new service level.
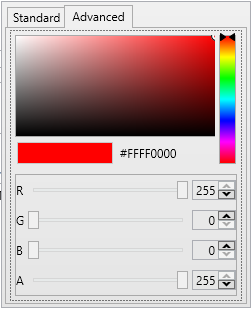
- (not required) If you wish to add a background colour that will be shown in the Dispatch Tab, click the the dropdown beside the "Background Color".

- Then from the colour picker, select a standard colour
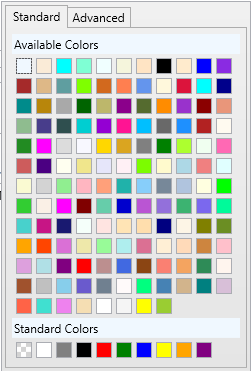
- If you wish to make your own colour, select "advance" and then use the screen to make your own colour.
- Then from the colour picker, select a standard colour
- (not required) If you wish to add a foreground colour (font colour) that will be shown in the Dispatch Tab, click the the dropdown beside the "Foreground Color".

- Then from the colour picker, select a standard colour.
- If you wish to make your own colour, select "advance" and then use the screen to make your own colour.
- Then from the colour picker, select a standard colour.
- (not required) If you wish to set which days and times the Service Level is available for your customers entering their shipments online, then set the "Active Time & Days" by completing the following steps:
- In the "Active Time & Days" section

- Set the "Start" time for when you wish the Service Level to start being available.
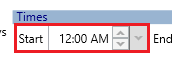
- Set the "End" time for when you wish the Service Level to stop being available.
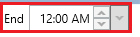
- Set the "Days" of the week you wish the Service Level is to be available by ticking the day.

- In the "Active Time & Days" section
- (not required). If you wish to automatically set the "Due By" time for a shipment ("Due By" aka when the shipment needs to be delivered by), then do the following:
- Set the "Delivery" time
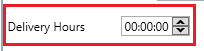
- To the amount of time between the "Ready By" time ("Ready By" aka the time the shipment needs to be picked up by) and the "Due By" time.
- Set the "Delivery" time
- (not required). If you wish to set the "Pick Up Conditions" and "Delivery Conditions" in the Dispatch or Drivers tab, then please do the following:
- In this section

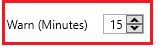
- Set the "Warn" time to how many minutes before the "Warn" label should appear in the Conditions fields.
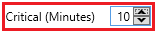
- Set the "Critical" time to how many minutes before the "Critical" label should appear in the Conditions fields.
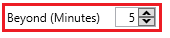
- Set the "Beyond" time to how many minutes before the "Beyond" label should appear in the Conditions fields.
- In this section
- (not required). If you wish to limit the "Package Types" that can be used with the Service Level, then please do the following:
- In the "Select Package Type for Service Level" Section.

- Select the Package Type from the dropdown that will be allowed to used with the Service Level.
(When you add a Package Type, only those Package types will work with the Service Level. If you don't add a Package Type, then by default, all Package Types will work with the Service Level)
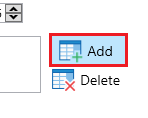
- Then click the "Add" button located on the far right hand side of the screen
- The added Package Type will then appear in the "Select Package Type for Service Level" field.

- Repeat steps 8.a. to 8.d. for each Package Type you wish to add to the Service Level.
- If you need to remove a Package Type from the Service Level, then highlight the Package Type from the "Select Package Type for Service Level" field.
- Then click the "Delete" button located on the far right hand side.
- In the "Select Package Type for Service Level" Section.
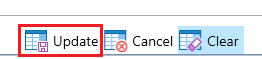
- Then click on the "update" button
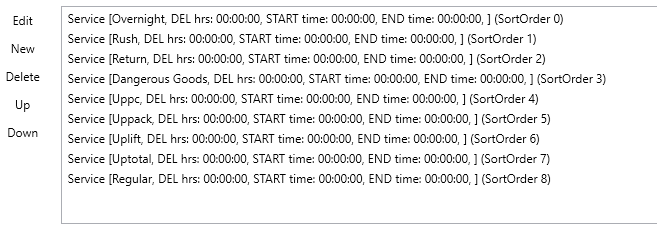
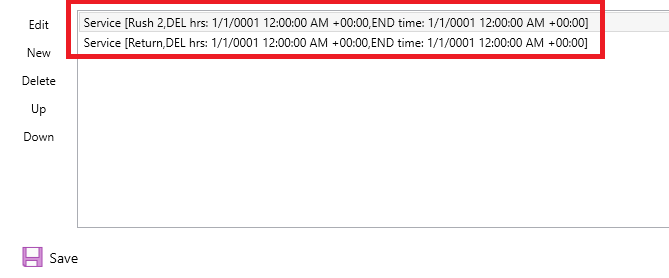
- You will be able to see the new service level(s) at the bottom of the service level list.
- When you have finished adding all your new service levels, click the "Save All" button located on the top left hand side of the screen.

How to edit an existing Service Level
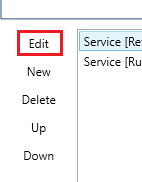
- Select a single existing service level from the list located in the bottom of the screen.

- Click the 'Edit ' button located on the bottom left hand side of the screen.
- In the "Service Levels" field you can change the name if needed.
- (not required) If you wish to change a background colour that will be shown in the Dispatch Tab, click the the dropdown beside the "Background Color".
- Then from the colour picker, select a standard colour
- If you wish to make your own colour, select "advance" and then use the screen to make your own colour.
- Then from the colour picker, select a standard colour
- (not required) If you wish to change a foreground colour (font colour) that will be shown in the Dispatch Tab, click the the dropdown beside the "Foreground Color".
- Then from the colour picker, select a standard colour.
- If you wish to make your own colour, select "advance" and then use the screen to make your own colour.
- Then from the colour picker, select a standard colour.
- (not required) If you wish to set which days and times the Service Level is available for your customers entering their shipments online, then set the "Active Time & Days" by completing the following steps:
- In the "Active Time & Days" section
- Set the "Start" time for when you wish the Service Level to start being available.
- Set the "End" time for when you wish the Service Level to stop being available.
- Set the "Days" of the week you wish the Service Level is to be available by ticking the day.
- In the "Active Time & Days" section
- (not required). If you wish to automatically set the "Due By" time for a shipment ("Due By" aka when the shipment needs to be delivered by), then do the following:
- Set the "Delivery" time
- To the amount of time between the "Ready By" time ("Ready By" aka the time the shipment needs to be picked up by) and the "Due By" time.
- Set the "Delivery" time
- (not required). If you wish to set the "Pick Up Conditions" and "Delivery Conditions" in the Dispatch or Drivers tab, then please do the following:
- In this section
- Set the "Warn" time to how many minutes before the "Warn" label should appear in the Conditions fields.
- Set the "Critical" time to how many minutes before the "Critical" label should appear in the Conditions fields.
- Set the "Beyond" time to how many minutes before the "Beyond" label should appear in the Conditions fields.
- In this section
- (not required). If you wish to limit the "Package Types" that can be used with the Service Level, then please do the following:
- In the "Select Package Type for Service Level" Section.
- Select the Package Type from the dropdown that will be allowed to used with the Service Level.
(When you add a Package Type, only those Package types will work with the Service Level. If you don't add a Package Type, then by default, all Package Types will work with the Service Level) - Then click the "Add" button located on the far right hand side of the screen
- The added Package Type will then appear in the "Select Package Type for Service Level" field.
- Repeat steps 8.a. to 8.d. for each Package Type you wish to add to the Service Level.
- If you need to remove a Package Type from the Service Level, then highlight the Package Type from the "Select Package Type for Service Level" field.
- Then click the "Delete" button located on the far right hand side.
- In the "Select Package Type for Service Level" Section.
- Then click on the "update" button
- You will be able to see the edited service level(s) in the service level list located on the bottom of the screen.
- When you have finished editing your service levels, click the "Save All" button located on the top left hand side of the screen.
How to re-order Service Levels
To re-order your Service Levels, please do the following.
- In the list of Service Levels located on the bottom of the screen
- select one service level.
- Then click either the "up" or "down" button.
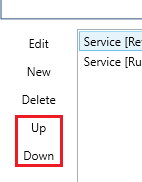
- This will move the selected service level up or down.
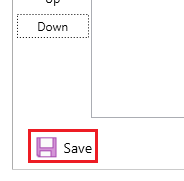
- Then click the "Save" button located on the bottom of the screen.
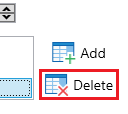
How to delete a Service Level
To delete a Service Level, please do the following.
- In the list of Service Levels located on the bottom of the screen.
- Select one service level.
- Then click on the "Delete" button.
- a pop up will appear:
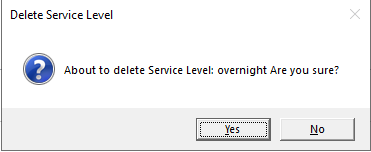
- Click "Yes" to delete the service level.
- Click "No" to not delete the service level.
- Then click the "Save" button located on the bottom of the screen.
(Click to go back to IDS Core Tutorial Home Page )
, multiple selections available,
Related content
How to Edit the Rate Wizard
How to Edit the Rate Wizard
More like this
How to Create a Service Level
How to Create a Service Level
More like this
How to Edit a Service Level
How to Edit a Service Level
More like this
Rate Wizard
Rate Wizard
More like this
Package Types
Package Types
More like this
How to Create Edit a Rate in the Rate Matrix
How to Create Edit a Rate in the Rate Matrix
More like this