How to Use the Shipment Entry Tab
- Gord More (Unlicensed)
- Rowan Simms-Riddell
- Navjot Kaur (Unlicensed)
This article will help you to learn about the Shipment Entry Tab
Table of Contents
How to open a Shipment Entry Tab
How to create a shipment
How to print waybill
How to select a waybill printer
How to track a shipment
Toolbar Buttons
Hide Unhide Toolbar
Hot Keys
Right Click Menu
Go back to the IDS Core Tutorial Home Page
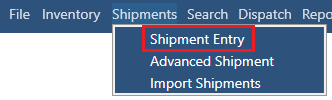
How to Open a Shipment Entry Tab
To open a "Shipment Entry" tab, please do the following:
- Click on "Shipments" in the Menu Bar

- Then click on "Shipment"
How to Create a Shipment
To create a new shipment, please do the following:
- Click on the "New" button to populate the "Shipment ID" field with a unique shipment id.

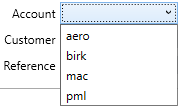
- Then select the Account from the drop-down.
- Enter in the Caller information (optional)
- If needed, you can change the "Call Date" to a time in the past. This will NOT schedule a shipment for a future date.
- This can be completed by doing one of the following:
- Using the up/down arrow keys

- Selecting the down button beside the date, then selecting a date from the calendar
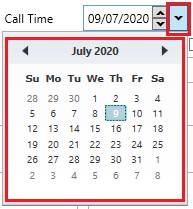
- or by typing in a date time
- Using the up/down arrow keys
- This can be completed by doing one of the following:
- Then enter in the Pick Up and Delivery information. This can be completed in two ways:
- Selecting an existing address from the "Company" drop-down field.
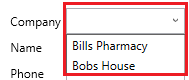
- Typing in a new address.
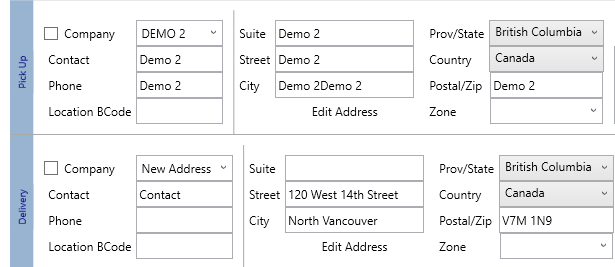
- Please Note: Location Bcode means the address's location barcode and can only be created or edited in the address book.
- Selecting an existing address from the "Company" drop-down field.
- (optional) Enter in any Address Notes:
- Address notes are saved with the address. Any future shipment using the same address record will show the same address note
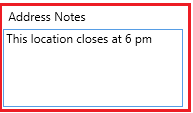
- Address notes are saved with the address. Any future shipment using the same address record will show the same address note
- (optional) Enter in any Pick Up or Delivery Notes:
- A Pick Up or a Delivery Note lives with the shipment.
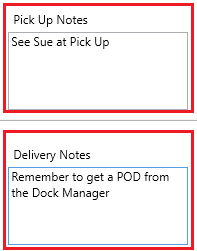
- A Pick Up or a Delivery Note lives with the shipment.
- Enter the Package Type, weight and number of pieces.

- (optional) To add an additional package(s) to the shipment, click on the "add another Package Type row" icon

- Once a shipment has more than one package, the "Remove Row" icon will appear, by clicking this icon you can remove package from the shipment

- (optional) For those that wish to add products as inventory to a package, please read this article: How to add inventory to a Shipment's package
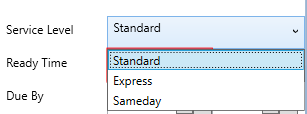
- Choose the main Service Level for the shipment.
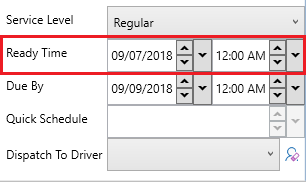
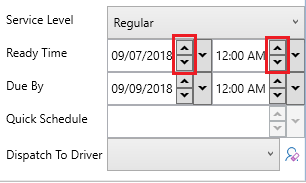
- (Optional) Select your "Ready Time" aka "When to pick up the shipment"
- This can be completed by doing one of the following:
- using the up/down arrow keys
- Selecting the down button beside the date, then selecting a date from the calendar
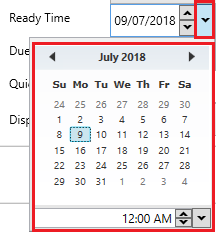
- or by typing in a date time
- using the up/down arrow keys
- This can be completed by doing one of the following:
- (Optional) Select your "Due By" time aka "When to delivery the shipment by"
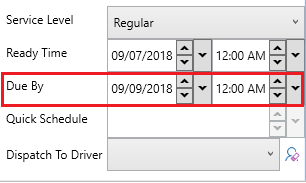
- This can be completed by doing one of the following:
- using the up/down arrow keys

- Selecting the down button beside the date, then selecting a date from the calendar
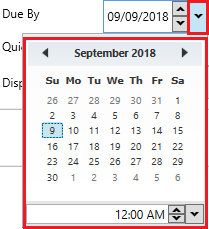
- using the up/down arrow keys
- This can be completed by doing one of the following:
- (optional) You can also select the driver from the "Dispatch to Driver" dropdown if you wish to dispatch the shipment right a way.
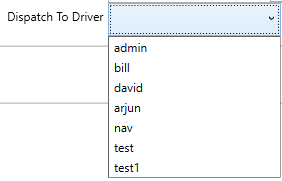
- To clear the driver, click the clear button next to the driver.

- To clear the driver, click the clear button next to the driver.
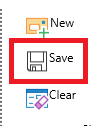
- After you are done click the "Save" button in the toolbar.
- To clear the screen you can click 'Clear' from the top of the screen.
Tips - Cloning
- You can copy and clone an existing shipment by simply clicking on the "Clone" button in the Toolbar.

- A cloned shipment will have a new unique Shipment ID but contain a copy of all the other shipment fields.
- To create a cloned "Pickup" shipment, simply click "Pickup" from the Toolbar.

- To create a cloned "Return" shipment, click "Return" in the Toolbar.

- To switch the Pickup and Delivery addresses, click "Swap" from the Toolbar.

How to Print Waybill
After:
- You have created a shipment and you still have the shipment loaded in the "Shipment Entry" tab
- Or you have found a shipment by using the Search Screen, then double clicked on the shipment to load it into the "Shipment Entry" tab.
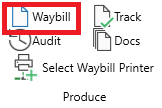
- In the Toolbar, click on the 'Waybill' button.
- The waybill window will open.
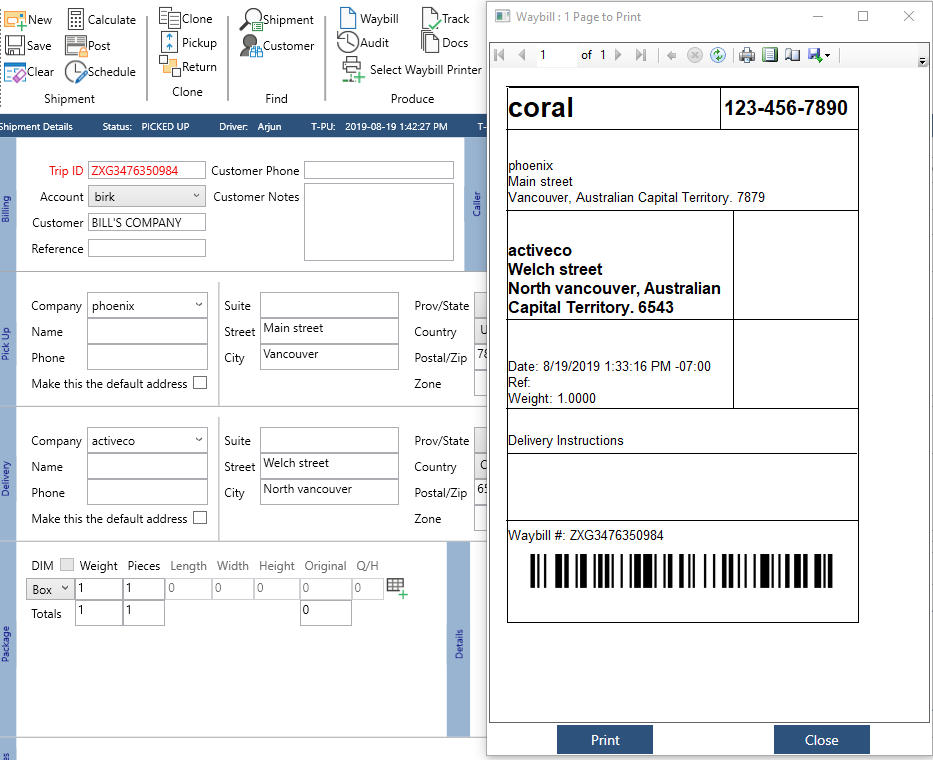
- Then click 'Print'.
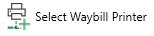
How to Select Waybill Printer
To select the printer to print Waybills follow these steps:
- Click "Select Waybill Printer" button from the Toolbar
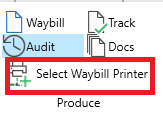
- This will show you all the available printers.
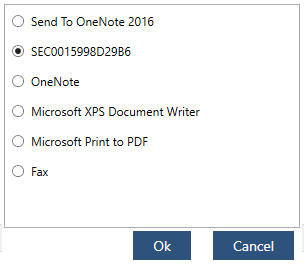
- Select the printer that you want to choose and click "OK".
- That printer will be saved as your default printer to print waybills only.
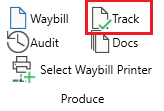
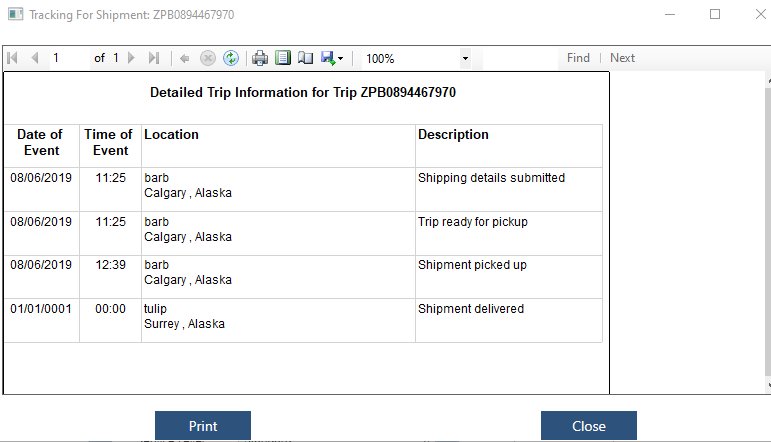
How to Track a Shipment
To track the shipment follow these steps:
After:
You have found a shipment by using the Search Screen, then double clicked on the shipment to load it into the "Shipment Entry" tab.
- You have found a shipment by using the Dispatch Tab, then right clicked and selected 'Open Shipment' on the shipment to load it into the "Shipment Entry" tab.
- You have found a shipment by using the Drivers Tab, then double clicked on the shipment to load it into the "Shipment Entry" tab.
- Click "Track" from Toolbar.

- The tracking window will open with the tracking details for your shipment.
Toolbar Buttons
Across the top of the Shipment Entry Tab, you will see the following toolbar:

 - click to create a new shipment.
 - click to save a new or existing shipment.
![]() - click to clear the shipment screen.
- click to clear the shipment screen.
 - click to calculate the shipment cost.
 - click to set the shipment's status to "posted"
 - to schedule the shipment.
- to clone the shipment. The new shipment will have all the fields populated with the original shipment, but will have a new id.
 - to create a cloned pick up shipment. The new shipment will have the same Pick Up Address but with a new Shipment ID
 - to create a cloned return shipment. The new shipment will reverse the Pick Up Address with the Delivery Address and have a new Shipment id.
 - enter in a shipment ID, then click to find the shipment.
 - will open the Account Details tab for the Account currently displayed.
 - click to produce a waybill/shipping label for the displayed shipment.
 - click to audit the displayed shipment.
 - click to track the displayed shipment.
 - click to see/add documents to the displayed shipment.
 - click to set the default printer for the waybill/shipping label.
- click to swap the Pick Up address with the Delivery Address
 - click to open up the Address Book tab.
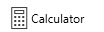 -click to open the calculator app on your computer.
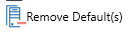 -click to forget saved defaults.
 - click to open this page in the Online Manual
Hide and Unhide Toolbar
By default, the toolbar is visible. To hide the toolbar, double click any white part of the toolbar.
If the Toolbar is hidden, it will look like this:

To unhide the toolbar, click on "view", then click on "Show Toolbar"
Hot Keys
Hot keys for the Shipment Entry Screen are as follows:
HotKey | Equivalent Button | Function |
|---|---|---|
| "Alt+N" | Create a new trip | (assigns a new trip ID) |
| ''Alt+1'' | Jump to the Billing Section | |
| ''Alt+2'' | Jump to the PickUp Section | |
| ''Alt+3'' | Jump to the Delivery Section | |
| ''Alt+4'' | Jump to the Package Section | |
| ''Alt+5'' | Jump to the Charges Section | |
| ''Alt+6'' | Jump to the PickUp Notes Field | |
| ''Alt+7'' | Jump to the Weight Field | |
| ''Alt+8'' | Jump to the Services Dropdown | |
| ''Alt+A'' | Find account | look up a trip by its trip ID |
| ''Alt+C'' | Calculate trip | does not save changes (preview) |
| ''Alt+D'' | Audit | show the audit trailfor current trip |
| "Alt+E" | Clone Pickup | creates a new trip with the same details and a blank delivery address |
| ''Alt+F'' | Find trip | find a trip by its trip ID |
| ''Alt+L'' | Clone trip | creates a new trip with same details |
| "Alt+P" | Swap | swaps pickup and delivery addresses |
| ''Alt+R'' | Clear | de-selects trip and clears all input boxes |
| ''Alt+S'' | Schedule trip | schedule a trip to be recurring |
| ''Alt+T'' | Copy Return Trip | creates a new trip with the same details and swaps delivery and pickup addresses |
| ''Alt+U'' | Update trip | saves all changes |
| "Alt+W" | Waybill | opens and prints the waybill |
| ''Alt+X'' | Next | also called "super tab", move cursor to next ''section'' |
| "Alt+Z" | Calculator | launches Windows calculator |
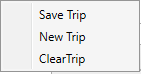
Right Click Menu
There are two right click menu's in the "Shipment Entry" tab
If you right click within a field, you will this: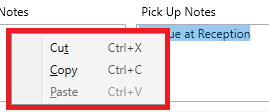
If you right click outside these fields, you will this: