How to Create Edit a Charge
- Gord More (Unlicensed)
- Devyn Caterer (Unlicensed)
Owned by Gord More (Unlicensed)
Last updated: Jul 26, 2018 by Devyn Caterer (Unlicensed)Version comment
Step-by-step guide
Logged into IDS as an Administrator
- Go to the Wizard dropdown, then select "Charges Wizard".
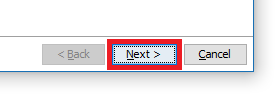
- Then select the "Next" button
- You are now in the Charges Screen.
Creating a Charge
- In the "Charge ID" field, enter in a charge id. This is an internal id and is not displayed on any screens. However, it is used to by Sage, Quickbooks and Great Plains.
- Never use spaces or a special character in this field. Numbers and letters only.
- In the "Display Label", enter in a name for this charges that will be displayed to both your staff and your customers.
- In the "Charge Type" dropdown, select the type of charge you want. They are:
- Cumulative - This adds a dollar value to a shipment.
- Percentage - This adds a percentage to a shipment. Example would be Fuel Surcharge or a Tax.
- Reference - This will not add any amount to a shipment. Example would be a notes field.
- Formula - This is used to create custom mathematical formulas. Please contact IDS Support for assistance in creating a formula.
- Ignore "Override - Package" and "Override - Service", they will be discussed further in this article.
- In the "Display Options" dropdown, select how you want your charge to be displayed. Options are:
- Nothing - this is used to create a space in the Trip Entry Screen between charges.
- Check Box - this creates a check box that activates the charge.
- Field Only - this creates a field to which the staff member and/or customer enters in a number.
- Check Box and Field - This creates a field that becomes active/editable when the check box has been ticked.
- Total - This displays the charge, but a staff member and/or a customer cant edit the charge.
- In the Default $ or % field, enter in the dollar amount or the percentage that will be charged.
- Never enter in the symbol of $ or %. Just enter in a number. By selecting percentage (3b above, the system will know it's a %, otherwise it's a dollar amount).
- If you want the charge to have a minimum amount, enter that amount into the "Minimum (0=off)" field. Otherwise, ignore this field.
- If you want the charge to have a maximum amount, enter that amount into the "Maximum (0=off)" field. Otherwise, ignore this field.
- If this charge is a tax, tick "Is a Tax"
- Never tick "Is a Tax" when it is not a tax. By ticking this, the amounts will appear in audit reports for the government and auditors.
- If this charge is always applied to all shipments, tick "Always Applied".
- If you have a Tax, taxes are always applied. If a client doesn't pay a tax, you can override the tax amount to 0, in Account Entry → Pull up the client's account → Default Charges.
- If this charge multiplies an amount, either the shipment's amount or a number entered into a field, then tick this box.
- Taxes and Fuel Surcharges will have this ticked.
- "Multiplier" means, you are wanting to Multiply a number by another number. Example: 2 times 3 = 6 is a multiplier, 2 plus 3 = 5, is not a multiplier.
- You have a charge, that when ticked, will multiple the value of a shipment by a dollar amount or a percentage.
- You will have a charge that will multiple the amount in the "Default $ or %" field by an amount entered into a "Field Only" (4c above) or "Check Box and Field" (fd above).
- Leave untick, if the amount in the charge is not a multiplier of the shipment value, nor a multiplier of an amount in a field.
- If you want this charge to appear to the customer online when they create a shipment, tick "Show on Web Entry".
- Before ticking "Show on Waybill" please contact IDS Support to ensure your waybill has this ability.
- If you want the amount of this charge to be excluded from payroll calculations, tick "Exclude from Payroll."
- If you want the amount of this charge to be excluded from Sales Tax calculations, tick "Exclude from Taxes."
- This works by excluding this new charge you are creating from any charge that has "Is a Tax" (point 8 above) ticked.
- If this is a fuel surcharge, tick "Is a Fuel Surcharge".
- If you want this new charge that you are creating to be excluded from Fuel Surcharge Calculations (point 15 above), tick this box.
- When done, click the "Add" button.
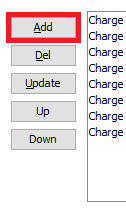
- Your new charge will be added to the list of charges on the bottom of the screen.
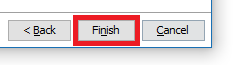
- If you are done creating and editing all your charges, click the "Finish" button.
To Edit a Charge.
- On the bottom of the Charges Wizard, you will see all your charges displayed.
- Double click on the charge you would like to edit.
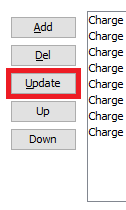
- You will now see the charge's details populating the fields located on the top of the screen.
- Make your changes. Please see the section above, "Creating a Charge", for a detail description of each field.
- Then click the "Update" button.
- If you are done editing and creating all your charges, click the "Finish" button.
To Delete a Charge.
- On the bottom of the Charges Wizard, you will see all your charges displayed.
- Double click on the charge you would like to delete.
- You will now see the charge's details populating the fields located on the top of the screen.
- Then click the "Del" button
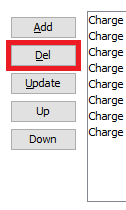
- If you are done editing and creating all your charges, click the "Finish" button.
To the change the Order of Display of your Charges in the Trip Entry Screen.
- On the bottom of the Charges Wizard, you will see all your charges displayed.
- Double click on the charge you would like to move.
- You will now see the charge's details populating the fields located on the top of the screen.
- Then use either the "Up" or the "Down" button to move the charge.
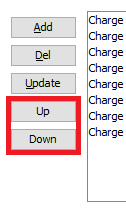
- If you are done editing and creating all your charges, click the "Finish" button.
Related articles
, multiple selections available, Use left or right arrow keys to navigate selected items