How to Install and Implement the Quickbooks Import program
Installation
Click http://www.idsapp.com/quickbooks/setup.exe to download the import program. Download the program to a folder on the hard disk drive.
Launch Windows Explorer and double click on the downloaded Setup.exe program.
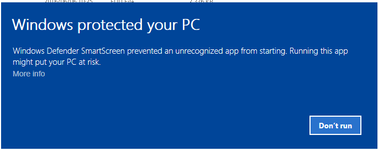
If this dialogue is displayed click on the “More Info” link. Then click the “Run Anyway” button.
The export program will be start installing.
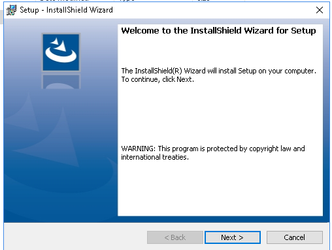
This dialogue will display. Click on next and next again then click the Install button.
When the installation is complete there will be a new IDS icon on the desktop labelled “Quickbooks Import”.
Before proceeding further a new user must be created in both IDS and Quickbooks.
IDS
Log into IDS as an administrator. Move to the “Staff Members“ screen and create a new user called import with the username of import and password of import. Assign the role of Admin to this user.
Make a note of the Fuel Surcharge ID in the Charges Wizard
Make a note of the invoice number previous too the first invoice number to be imported.
Request the Carrier ID and Account ID from IDS. Make a note of these with the invoice number.
Exit IDS
Quickbooks
Log into Quickbooks and create a new user with the username import and password import. Tick:
• “Selected Areas of Quickbooks” flag
• “Full Access” flag for Sales and Accounts Receivable
• “No Access” flag for Purchases and Accounts Payable
• “No Access” flag for Chequing and Credit Cards
• “Full Access” flag for Inventory
• “No Access” flag for Time Tracking
• “No Access” flag for Payroll and Employees
• “Full Access” flag for Sales Tax
• “Selective Access” and “Create Transactions Only” flags for Sensitive Accounting Activities
• “No Access” flag for Sensitive Financial Reporting
• “No Access” flag for Changing or Deleting Transactions
• Click “Finish”
Check the chart of accounts and make a note of the Sales Ledger, Fuel Surcharge Ledger, Asset Ledger and Cost of Good Ledger account numbers. If there is no fuel surcharge then use the Sales Ledger account number.
Exit Quickbooks.
Setting up the parameters for the Export program
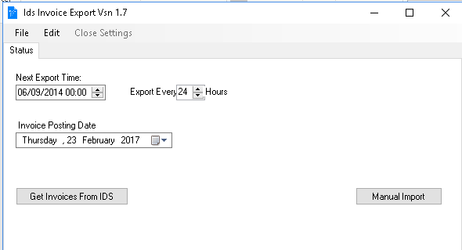
Click on the icon to start the export program. The following dialogue is displayed.
To create the links to your IDS system, click “Edit” in the title bar of the dialogue box. Then click “Preferences” and “IDS”
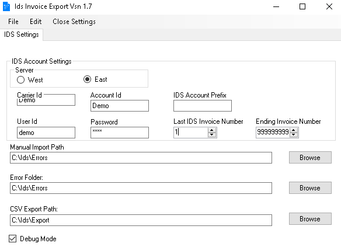
Referring to the dialogue box above:
• Tick the East Server.
• Enter the Carrier ID and Account ID received from IDS.
• Enter the User ID and Password created in IDS.
• Enter the invoice number previous too the invoice number from which the import program is to start.
• Enter the Ending invoice number if the import program is not to import all the invoices that have not yet been imported.
• Tick the Debug flag. This will help IDS track errors if necessary.
• The “Manual Import Path”, “Error Folder” and “CSV Export Path” will be automatically created during the first export.
• Click “Close Settings”.
Setting up the parameters in Quickbooks import program
Click on the icon to start the Quickbooks Import program. The following dialogue is displayed.
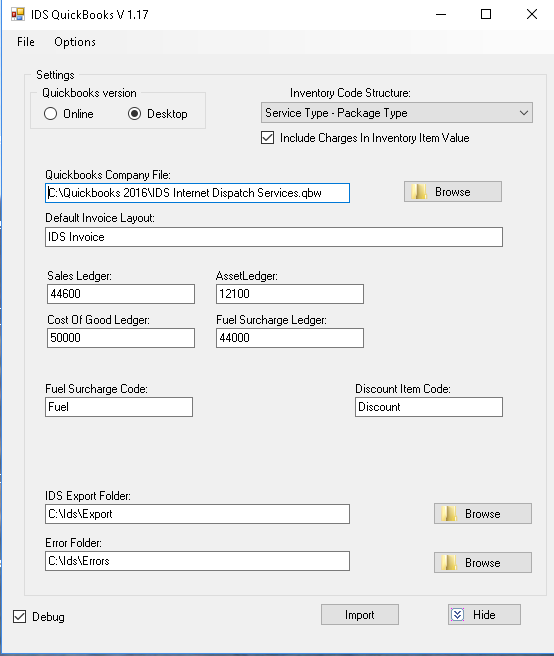
Referring to the dialogue box above:
• Tick “Desktop”
• Select the “Inventory Code Structure” from the drop down list. The options were detailed in the Third Party Accounting Software overview page.
• “Include Charges In Inventory Item Value”. Tick if amounts for accessorial charges are to be added to the Delivery Charge and shown as one total. Leave blank if the accessorial charges are to be shown separately on the Quickbooks invoice. This parameter can be changed later if required.
• Click the “Browse” button to select the Quickbooks file to be updated.
• Enter the “Default Invoice” layout that Quickbooks is using for your invoices.
• Enter the Ledger Numbers and Fuel Surcharge Code previously noted.
• Enter the word Discount in the “Discount Item Code”
• Tick the “Debug” flag.
All Done. Now is the test.
Log all users of Quickbooks.
Run a Quickbooks backup
Start the Generic Export Program
Click on “Get Invoices From IDS”
When the export is completed
Start the Quickbooks import program
Click on “Import”
Depending on the number of invoices to import the program can run overnight. BE PATIENT
NOTE: Before proceeding further read these important notes
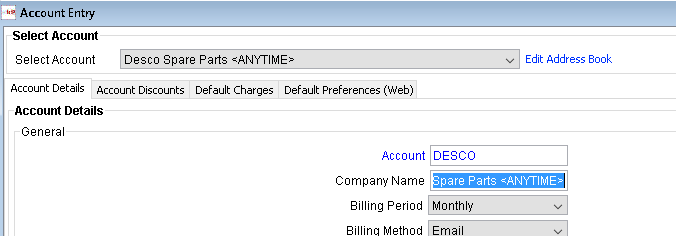
The import program can automatically create customer accounts as part of the import process. If there are already customer accounts in Quickbooks the company name must be precisely identical to the company name in IDS. An extra space or full stop means the names will not match and a new account will be automatically created in Quickbooks.
The best way to be safe is to create a link between the Company Name in IDS with the customer name in Quickbooks. This is done by copying the customer name in Quickbooks and pasting it at the end of the “Company Name” in IDS. Ie Customer Name “ANYTIME” in Quickbooks is
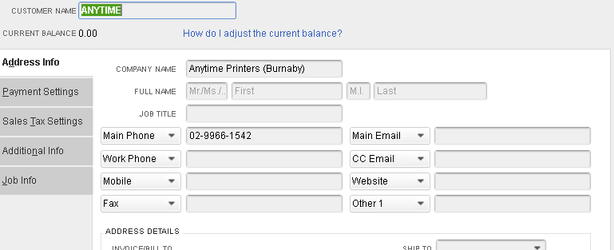
copied and added to the IDS “Company Name” and enclosed in these <> brackets.
It is safest to create a backup before starting the import run.
When exiting the import program make sure to answer NO to the “Minimise to the icon Tray”
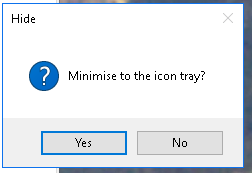
Confirming yes to this prompt will place the import program in the system tray and the program will start to automatically import based on the “Import Every xx Hours” setting.