| Anchor | ||||
|---|---|---|---|---|
|
Table of Contents
How to open a Shipment Entry Tab
How to create a shipment
How to print waybill
How to select a waybill printer
How to track a shipment
Toolbar Buttons
Hide Unhide Toolbar
Hot Keys
Right Click Menu
Go back to the IDS Core Tutorial Home Page
| Anchor | ||||
|---|---|---|---|---|
|
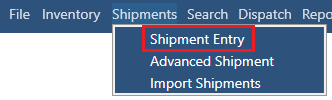
To open a "Shipment Entry" tab, please do the following:
- Click on "Shipments" in the Menu Bar

- Then click on "Shipment"
Anchor enter a shipment enter a shipment
How to Create a Shipment
| enter a shipment | |
| enter a shipment |
To create a new shipment, please do the following:
- Click on the "New" button to populate the "Shipment ID" field with a unique shipment id.

- Then select the Account from the drop-down.

- Enter in the Caller information (optional)

- If needed, you can change the "Call Date" to a time in the past. This will NOT schedule a shipment for a future date.
- This can be completed by doing one of the following:
- Using the up/down arrow keys

- Selecting the down button beside the date, then selecting a date from the calendar
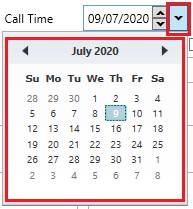
- or by typing in a date time
- Using the up/down arrow keys
- This can be completed by doing one of the following:
- Then enter in the Pick Up and Delivery information. This can be completed in two ways:
- Selecting an existing address from the "Company" drop-down field.
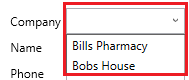
- Typing in a new address.

- Please Note: Location Bcode means the address's location barcode and can only be created or edited in the address book.
- Selecting an existing address from the "Company" drop-down field.
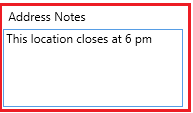
- (optional) Enter in any Address Notes:
- Address notes are saved with the address. Any future shipment using the same address record will show the same address note
- Address notes are saved with the address. Any future shipment using the same address record will show the same address note
- (optional) Enter in any Pick Up or Delivery Notes:
- A Pick Up or a Delivery Note lives with the shipment.

- A Pick Up or a Delivery Note lives with the shipment.
- Enter the Package Type, weight and number of pieces.

- (optional) To add an additional package(s) to the shipment, click on the "add another Package Type row" icon

- Once a shipment has more than one package, the "Remove Row" icon will appear, by clicking this icon you can remove package from the shipment

- (optional) For those that wish to add products as inventory to a package, please read this article: How to add inventory to a Shipment's package
- Choose the main Service Level for the shipment.

- (Optional) Select your "Ready Time" aka "When to pick up the shipment"
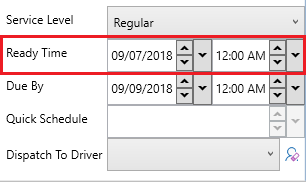
- This can be completed by doing one of the following:
- using the up/down arrow keys
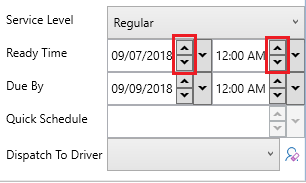
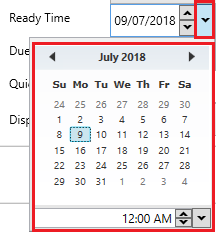
- Selecting the down button beside the date, then selecting a date from the calendar
- or by typing in a date time
- using the up/down arrow keys
- This can be completed by doing one of the following:
- (Optional) Select your "Due By" time aka "When to delivery the shipment by"
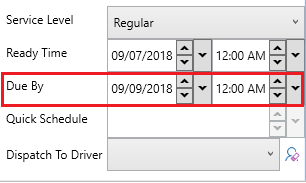
- This can be completed by doing one of the following:
- using the up/down arrow keys

- Selecting the down button beside the date, then selecting a date from the calendar
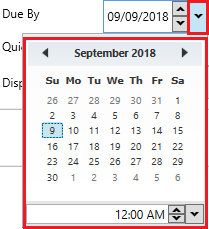
- using the up/down arrow keys
- This can be completed by doing one of the following:
- (optional) You can also select the driver from the "Dispatch to Driver" dropdown if you wish to dispatch the shipment right a way.

- To clear the driver, click the clear button next to the driver.

- To clear the driver, click the clear button next to the driver.
- After you are done click the "Save" button in the toolbar.

- To clear the screen you can click 'Clear' from the top of the screen.
| Info | ||
|---|---|---|
| ||
|


Anchor how to print how to print
How to Print Waybill
| how to print | |
| how to print |
After:
- You have created a shipment and you still have the shipment loaded in the "Shipment Entry" tab
- Or you have found a shipment by using the Search Screen, then double clicked on the shipment to load it into the "Shipment Entry" tab.
- In the Toolbar, click on the 'Waybill' button.

- The waybill window will open.

- Then click 'Print'.
Anchor how to select printer how to select printer
How to Select Waybill Printer
| how to select printer | |
| how to select printer |
To select the printer to print Waybills follow these steps:
- Click "Select Waybill Printer" button from the Toolbar

- This will show you all the available printers.

- Select the printer that you want to choose and click "OK".
- That printer will be saved as your default printer to print waybills only.
Anchor how to track how to track
How to Track a Shipment
| how to track | |
| how to track |
To track the shipment follow these steps:
After:
You have found a shipment by using the Search Screen, then double clicked on the shipment to load it into the "Shipment Entry" tab.
- You have found a shipment by using the Dispatch Tab, then right clicked and selected 'Open Shipment' on the shipment to load it into the "Shipment Entry" tab.
- You have found a shipment by using the Drivers Tab, then double clicked on the shipment to load it into the "Shipment Entry" tab.
- Click "Track" from Toolbar.

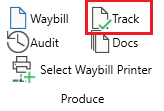
- The tracking window will open with the tracking details for your shipment.

| Anchor | ||||
|---|---|---|---|---|
|
Across the top of the Shipment Entry Tab, you will see the following toolbar:

 - click to create a new shipment.
 - click to save a new or existing shipment.
![]() - click to clear the shipment screen.
- click to clear the shipment screen.
 - click to calculate the shipment cost.
 - click to set the shipment's status to "posted"
 - to schedule the shipment.
 - to clone the shipment. The new shipment will have all the fields populated with the original shipment, but will have a new id.
 - to create a cloned pick up shipment. The new shipment will have the same Pick Up Address but with a new Shipment ID
 - to create a cloned return shipment. The new shipment will reverse the Pick Up Address with the Delivery Address and have a new Shipment id.
 - enter in a shipment ID, then click to find the shipment.
 - will open the Account Details tab for the Account currently displayed.
 - click to produce a waybill/shipping label for the displayed shipment.
 - click to audit the displayed shipment.
 - click to track the displayed shipment.
 - click to see/add documents to the displayed shipment.
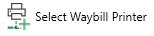 - click to set the default printer for the waybill/shipping label.
 - click to swap the Pick Up address with the Delivery Address
 - click to open up the Address Book tab.
 -click to open the calculator app on your computer.
 -click to forget saved defaults.
 - click to open this page in the Online Manual
| Anchor | ||||
|---|---|---|---|---|
|
By default, the toolbar is visible. To hide the toolbar, double click any white part of the toolbar.
If the Toolbar is hidden, it will look like this:

To unhide the toolbar, click on "view", then click on "Show Toolbar"
| Anchor | ||||
|---|---|---|---|---|
|
Hot keys for the Shipment Entry Screen are as follows:
HotKey | Equivalent Button | Function |
|---|---|---|
| "Alt+N" | Create a new trip | (assigns a new trip ID) |
| ''Alt+1'' | Jump to the Billing Section | |
| ''Alt+2'' | Jump to the PickUp Section | |
| ''Alt+3'' | Jump to the Delivery Section | |
| ''Alt+4'' | Jump to the Package Section | |
| ''Alt+5'' | Jump to the Charges Section | |
| ''Alt+6'' | Jump to the PickUp Notes Field | |
| ''Alt+7'' | Jump to the Weight Field | |
| ''Alt+8'' | Jump to the Services Dropdown | |
| ''Alt+A'' | Find account | look up a trip by its trip ID |
| ''Alt+C'' | Calculate trip | does not save changes (preview) |
| ''Alt+D'' | Audit | show the audit trailfor current trip |
| "Alt+E" | Clone Pickup | creates a new trip with the same details and a blank delivery address |
| ''Alt+F'' | Find trip | find a trip by its trip ID |
| ''Alt+L'' | Clone trip | creates a new trip with same details |
| "Alt+P" | Swap | swaps pickup and delivery addresses |
| ''Alt+R'' | Clear | de-selects trip and clears all input boxes |
| ''Alt+S'' | Schedule trip | schedule a trip to be recurring |
| ''Alt+T'' | Copy Return Trip | creates a new trip with the same details and swaps delivery and pickup addresses |
| ''Alt+U'' | Update trip | saves all changes |
| "Alt+W" | Waybill | opens and prints the waybill |
| ''Alt+X'' | Next | also called "super tab", move cursor to next ''section'' |
| "Alt+Z" | Calculator | launches Windows calculator |
| Anchor | ||||
|---|---|---|---|---|
|
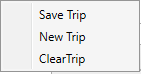
There are two right click menu's in the "Shipment Entry" tab
If you right click within a field, you will this: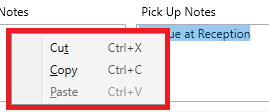
If you right click outside these fields, you will this: