...
| Anchor | ||||
|---|---|---|---|---|
|
How to open a Maintain Staff Tab
Create a new Staff Member
Searching for Staff Members
Edit an existing Staff Member
Adding a Note to a Staff Member
Toolbar Buttons
Hide Unhide Toolbar
Hot Keys
Go back to the IDS Core Tutorial Home Page
...
- To open the Maintain Staff tab, click on 'Staff'.

- This will open a new "Maintain Staff" tab.
| Anchor | ||||
|---|---|---|---|---|
|
...
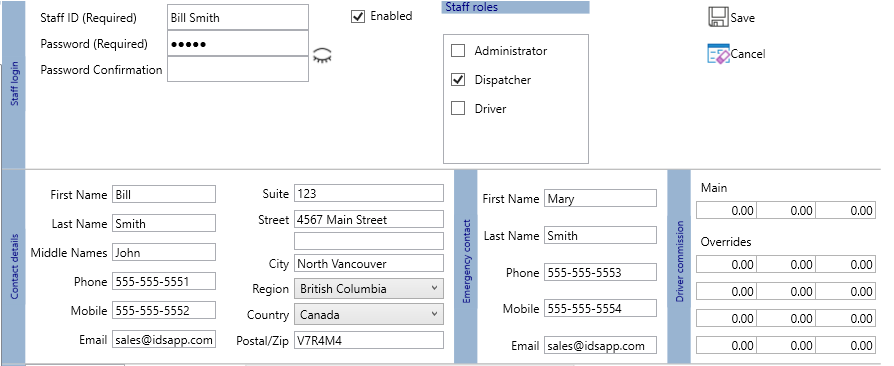
- Enter in the Staff ID.
(Remember, this is what your end-users, including your drivers, will type into the login screen, so keep it simple) - Enter in a password into the first password field.
- If you see the following message:
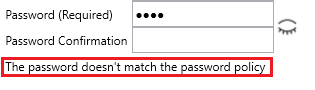
- Then the password entered in doesn't match your company's password policy.
- You will need to change the password.
- Or changed your password policy in the preference section
- To see the password you typed in, click on the eyelash symbol


- Enter in the password again into the "Password Confirmation" field.
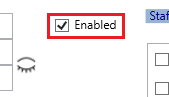
- Ensure enabled is ticked
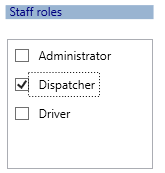
- Select the Users Role.
Roles:- define what Tabs and Screens can be used by the Staff Member.
- defines if the staff member is a Driver so that they are available in the Dispatch and Drivers Tab and can access IDS Mobile.
- are created and editing in the Roles Section.
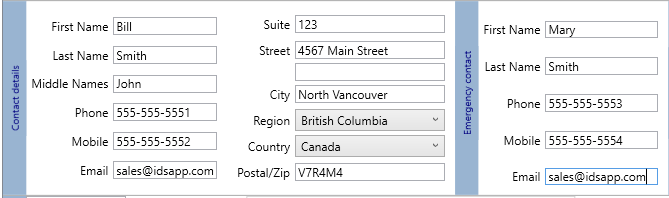
- Fill in the "Contact Details" and "Emergency Contact" sections as needed.
- Click the "Save" button

| Anchor | ||||
|---|---|---|---|---|
|
...
- Across the top of your staff members list you will see the following

- To filter by staff roles, check the box beside "Select", then select the role from the dropdown
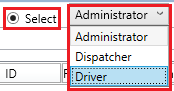
- When you click on "Select" you will see this pop up:
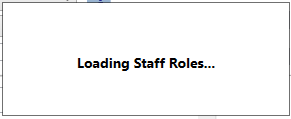
- IDS Core is loading all the staff roles for each of your users.
- When completed, you can filter your users by their roles.
- When you click on "Select" you will see this pop up:
- To see "All" users, check the box beside "All"

- To see only Staff Members that are enabled, check the box beside "Enabled"

- To see only Staff Members that are Disabled, check the box beside "Disabled"

- To find the user by their name, simply start typing in the "Filter" field

| Anchor | ||||
|---|---|---|---|---|
|
...
- Double click on their name
- Or select their name and click the edit button located on the bottom of the screen

- This will load the Staff Member's record on the right hand side of the screen
- Make your changes.
- Then click the "Save" button
| Anchor | ||||
|---|---|---|---|---|
|
...
- Double click on their name
- Or select their name and click the edit button located on the bottom of the screen
- This will load the Staff Member's record on the right hand side of the screen
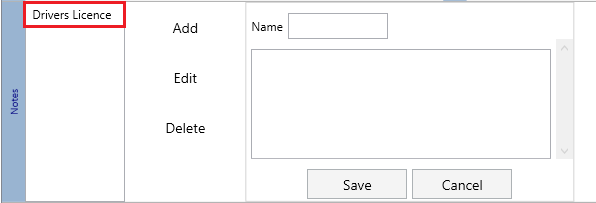
- You will see the "Notes" section located on the bottom right hand side of the screen
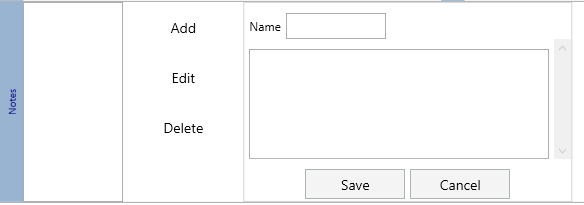
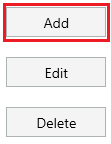
- To add a note, click on the "Add" button
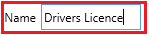
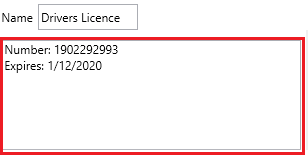
- Enter in a "Name" for the note.
- Write in the details
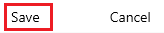
- Then click "Save"
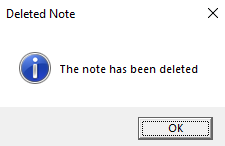
- A pop up will appear saying the Note has been saved.
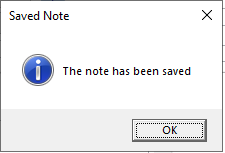
- Click "Ok"
- You will see your new note appear on the left hand side of the "Notes" Section
- To edit a note, select the note from the left hand side of the "Notes" section
- Then click the "Edit" button
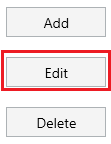
- Make your changes to the note.
- Then click the "Save" button
- To delete a note, select the note from the left hand side of the "Notes" section
- Then click the "Delete" button
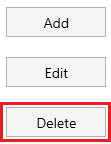
- Then click "Yes"
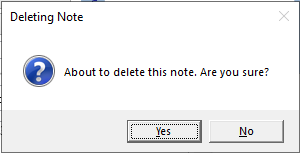
- Then click "Ok"
| Anchor | ||||
|---|---|---|---|---|
|
...
 - Accesses this help page in the online Manual.
| Anchor | ||||
|---|---|---|---|---|
|
...
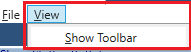
To unhide the toolbar, click on "view", then click on "Show Toolbar"
| Anchor | ||||
|---|---|---|---|---|
|
To use the hotkeys, you will need to hide the toolbar first, to do this please see above.
...
Press "alt" and "f" at the same time.
Then you would press c.
(Click to go back to IDS Core Tutorial Home Page )
...