How to Use The Drivers Boards to Monitor Shipments and Drivers and reassign Shipments.
This article describes how to monitor shipments and drivers and how to dispatch and reassign shipments using the Drivers Board.
If you double click on any shipment, it will appear in the Search and Edit Tabs, so you can edit the shipment
To Jump to a Section in this article, click on a link below:
How to Monitor Driver Shipments and Drivers.
How to Use Drag and Drop to Reassign Shipments.
How to create Drivers Boards
The first thing you will need to do is create a Driver Board.
1. To create a Drivers Board, click 'New Drivers Board' by clicking on 'Dispatch'
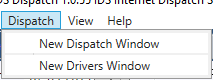
2. This will open a Drivers Window.

3. You can drag the created Drivers Board anywhere on your screen as well as onto another monitor. Simply place your mouse at the top of the Driver Board. For example here:

Then hold your left mouse button down and drag to where you want to place the Drivers Board.
4. You can then filter the Driver Board to only show certain shipments and/or certain fields by clicking on the Driver Board's Setting Tab. For more information, please read: How to use the Driver Boards Settings Tabs
5. You can create Multiple Drivers boards by clicking on "Open New Drivers Board" again.
6. Your created Driver Boards will automatically reopen when you log back in.
Click to go back to the top of this article.
How to Monitor Drivers and Shipments
The color of shipments and the dots beside shipments help you monitor shipments.
The color dots beside shipments mean the following:
 a Red Dot means the shipment has been assigned to the Driver, but the shipment has not been downloaded onto the IDS 2 App.
 an Orange Dot means the shipment has been downloaded onto the Drivers IDS 2 App but has not opened/read by the driver.
 a Green Dot means the drivers has clicked and opened and viewed the shipment in the IDS 2 App.
The color of shipments mean the following:
Shipments that are Brown are in a status of "Dispatched" and need to be Picked Up

Shipments that are Green are in a status of "Picked Up" and need to be delivered.

Click to go back to the top of this article.
How to Use the Drivers Board
You can use following functions to alter shipments.
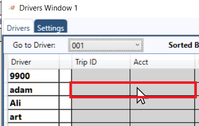
Go-To a specific Driver
If you are looking for a specific driver and don't want to scroll through all the shipments on your Driver Board you can use the Go-To box to speed up the process
1. Click on the Go To Driver dropdown box from the top of the window

2. Select a Driver from the dropdown
.png?version=1&modificationDate=1528319585098&cacheVersion=1&api=v2)
Bounce / Delete or Set Trip Status
Select the shipment to Bounce / Delete or Set Trip Status
1. To Bounce use the bounce button located at the bottom of the window

2. To Delete use the delete button located at the bottom of the window

3. To Set Trip Status right click a shipment and hover over the Set trip status option
.png?version=1&modificationDate=1528316688342&cacheVersion=1&api=v2)
Then select the status you wish to place the trip in. You may also Bounce / Delete from this menu and Reset Driver Received Flags.
.png?version=1&modificationDate=1528316736175&cacheVersion=1&api=v2)
Assign a Driver or Zone
Select the shipment to assign to a Driver or Zone
1. To Assign a Driver right click a shipment and hover over the Assign Driver option
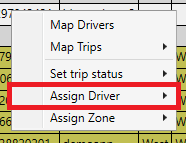
Then select a driver from the list that appears
2. To Assign a Zone, right click on a shipment and hover over the Assign Zone option
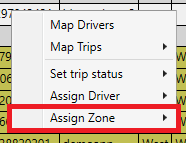
Then select a zone from the list that appears
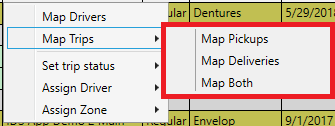
Map Drivers or Trips
Select the shipment to map or open the map drivers web app by right clicking on any shipment
1. To map a trip's pickup and delivery locations select the map trips option
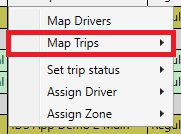
Then select which locations you want to map
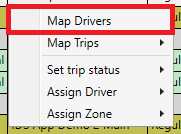
2. To open the map drivers web app select the map drivers option. Click here for an article on how to use the GPS Map.
Click to go back to the top of this article.
How to Use Drag and Drop to Reassign Shipments.
You can drag shipments from one driver to assign them to another driver.
- Highlight one or more shipments in the Drivers board by,
- holding down the "Ctrl" key, then selecting each shipment.
- holding down the "shift" key, then selecting the top record, then selecting the bottom record.
- If its just 1 shipment, just select it.
- So that the shipments are highlighted in blue.

- Then put your mouse cursor on top of the highlighted shipments

- Then hold down your main mouse button. .
- Keeping your main mouse button down, still on the drivers board, drag the shipments to the driver you wish to assign the shipment to.
- Each driver has a gray colored row beside their name, place your mouse cursor in this row
- Each driver has a gray colored row beside their name, place your mouse cursor in this row
- Then let go of your main mouse button.
- The shipments will then appear in the drivers board assigned to that driver.

- They will disappear off the dispatch board.
Click to go back to the top of this article.