...
| Info |
|---|
Please Note. Every company sets up IDS in their own unique way. Please use the screen shots screenshots in this article as a reference. |
Tick Boxes
Beside the following fields, you will special tick boxes:
- Phone.
- Email.
- Client Reference
- Pickup Info Select Address dropdown
- Delivery Info Select Address dropdownWeight Pieces.
- Select Service Level dropdown.
For example:


When you fill in the fields or select an address or service level and tick these boxes, then when you create the shipment, whatever you entered or selected will become your these fields are filled and the check boxes are ticked, when the shipment is created whatever you entered will become the default for those fields. This This is useful as it will save time you time in not having to fill in each field for every new shipment.
HOWEVER! only use these tick these boxes if you want to change or set a default for these fields. If you decide to tick these boxes for every shipment, then you will be changing your defaults every time you make a new shipment.
If you need to reset the field defaults after ticking the above boxes, you can do so by following this article: Click Here
Creating a New Shipment
Step-by-step guide
- Click on the "Enter New Trip" Tab


- Fill in you your name, phone number , and email address.

- In the "Client Reference" field, enter in an any reference you need to keep track of this shipment, for . For example a Purchase Order Number, Billing Code, 3rd Party Tracking Number.

- Select a "Ready Time", this is also known as Pick Up time, by:
- Clicking in the dropdown and scrolling down to the time for when you wish the shipment to be picked up.
- Clicking in the dropdown and then typing in the time. When you type in the time, you will notice that the dropdown jumps down to the time you have typed in.

.png?version=1&modificationDate=1527008714291&cacheVersion=1&api=v2)
- Select the "Due By time", this is also known as Delivery Time, by:
- Clicking in the dropdown and scrolling down to the time for when you wish the shipment to be delivered.
- Clicking in the dropdown and then typing in the time. When you type in the time, you will notice that the dropdown jumps down to the time you have typed in.

.png?version=1&modificationDate=1527008810876&cacheVersion=1&api=v2)
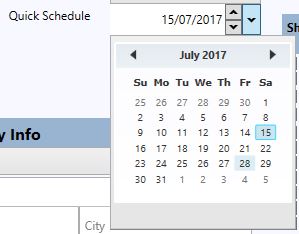
- Quick Schedule. Only use this if the shipment should is not to be Dispatched/Picked up until a future date. Dont Don't use this if you wish to have want the Shipment to be Picked Up today.
- The date format format for the Quick Schedule field is Day/Month/Year.
- The fastest way to select a date, is to click the large down arrow located on the right hand side of this field:


- Then select a date from the pop up calendar
- Or you can manually edit the field:
- To change the day, click on the day in the field:


- To change the month, click on the month in the field.


- To change the year, click on the year in the field.


- Then use Using your keyboard's up and /or down arrow keys or click clicking on the up or and down arrows on the screen changes the date by day:


- To change the day, click on the day in the field:
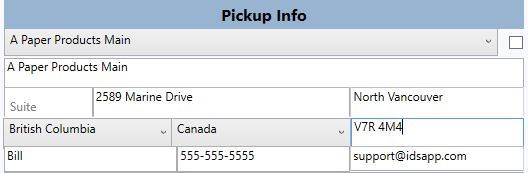
- For Pick Up Info, you can do the following.
- To save time and help keep keep your address book clean of duplicate entries, you can find and reuse previousily previously entered in addresses by:
- Clicking on the "Select Address" dropdown in the Pickup Info Section.

- Then either:
- Scroll down to the address you wish to use.
- Or by typing in the Name of the Company. When you do this, you will see the focus box jump down to what you are typing.
- Clicking on the "Select Address" dropdown in the Pickup Info Section.
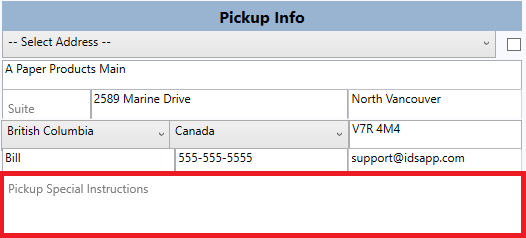
- If this is a new address and you cant find the address in the dropdown as described above (point 7. a. i.), then simply fill the address fields.
- In the "Pickup Special Instructions" field, type in any special pick up instructions for this shipment.

- To save time and help keep keep your address book clean of duplicate entries, you can find and reuse previousily previously entered in addresses by:
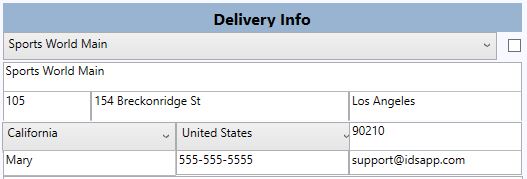
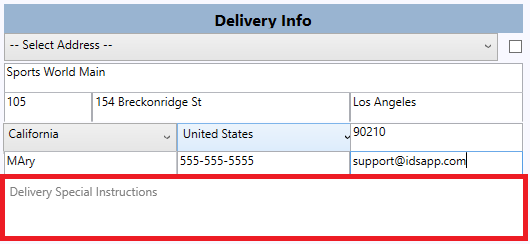
- For Delivery Info, you can do the following.
- To save time and help keep keep your address book clean of duplicate entries, you can find and reuse previousily entered in addresses by:
- Clicking on the "Select Address" dropdown in the Pickup Info Section.

- Then either:
- Scroll down to the address you wish to use.
- Or by typing in the Name of the Company. When you do this, you will see the focus box jump down to what you are typing.
- Clicking on the "Select Address" dropdown in the Pickup Info Section.
- If this is a new address and you cant find the address in the dropdown as described above (point 8. a. i. ), then simply fill the address fields.
- In the "Delivery Special Instructions" field, type in any special delivery instructions for this shipment.

- To save time and help keep keep your address book clean of duplicate entries, you can find and reuse previousily entered in addresses by:
- At this time DIM (Dimessional Dimensional Weighting) has not been activated for this new PC Software Client. However, we plan to have this working within the near future.

Please leave DIM unchecked. - Select your Package Type from the dropdown dropdown (Every company sets up IDS in their own unique way. Please use this screen shot screenshot as a reference, your list will be different).

.png?version=1&modificationDate=1527012054296&cacheVersion=1&api=v2)
- Enter in the Piece Amount.


- Enter in the Weight.


- As per point 9 above, DIM has not been activated, as such the following fields are locked.


- Select your Service Level from the dropdown (Every company sets up IDS in their own unique way. Please use this screen shot screenshot as a reference, your list will be different).

.png?version=4&modificationDate=1527012435855&cacheVersion=1&api=v2)
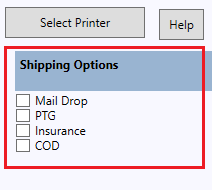
- Select any Shipping Options (Every company sets up IDS in their own unique way. Please use this screen shot screenshot as a reference, your list will be different).

- When you are done, click the "Ship Now" button located on the bottom of the screen


- If you didnt fill in all the required fields, you will see this message appear.

Please fill in any of the fields highlighted in yellow and then press "Ship Now" again. - When you have successfully created a new shipment, the WayBill screen will appear
 .
.
Please note, the first time you create a shipment, there is a delay as the Waybill Program is loaded.
- Then click the "Print" button. To set up a unique default printer for the IDS Shipping Portal please see this article: How to Set a Custom Default Printer for the IDS 2 Shipping Portal


- When done printing, click "Close"


- If you wish to know an Estimate based on the information you entered in. Click on the "Estimate" button.

You will then see an Estimate for your shipment.

Info Remember, that if the final shipment ends up weighing more, has more pieces, changes its' service type or package type or any other additional fees for re-deliveries, tailgate lift, etc, are added, then your final shipment will cost more. This is just an estimate based on the information you entered in.
...