...
To continue with this article, zones MUST have already been created. To create or edit Zones, please see this article: How to Create Edit Zones
...
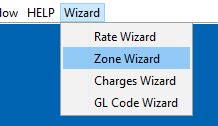
- Logged into IDS's PC Client as an Admin, locate the Wizard Dropdown in the top left hand side of the IDS PC Client.

- If you don't see "Wizard" , then you are not logged in is not visible then exit and login as an "admin." user.
- Click on the "Zone Wizard"
- You will now see this screen.
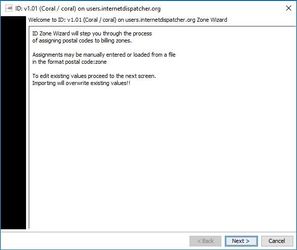
- Locate and press the "Next" button 1 time.
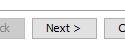
- You will now see a screen that looks like this.
- From this screen you can import a file that contains the relationship between Zones to Zips - Postal Codes.Click "Next" to proceed to the Import Zones screen.
- This screen facilitates the import of an externally file containing Zone to Zip - Postal Code Relationships
- This file needs to be a Text File .txt.
This file needs to be: Postal Code/Zip:Zone. For Example, V7R 3P1:NVan or 90210:BHill
One line of the file will contain only 1 relationship between Zone to Zip - Postal Codes
The delimiter must be a full colon : Comma , will not work.
The Zones in the file MUST be already created. Zones are Case Sensitive. To create zones, please see this article: How to Create Edit Zones
- If you don't wish to To skip the import a file option, press click the "Next" button 1 time.
- Your The screen will now look something like this (You will have different Zones):
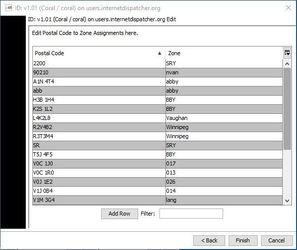
- To create a new relationship between Zones to Zips - Postal Codes, click the "Add Row"
- This will add a blank row in the main section of the pop up.

- Double click in the new blank row in the Postal Code Column, then type in your the postal code - zip.

If your
The pop up re-sorts and you can no longer see your blank row, click on the "Zone" column head to re-sort so that the blank row is back on top. - Double click in the new blank row in the "Zone" Column, then type in the Zone. REMEMBER: Your zones must have already been created. Zones are Case Sensitive.

- Then click anywhere else in the Zone Wizard Screen.
- Repeat as needed for every new Zone to Zip - Postal Code relationship.
- When done, click "Finish"
- If you see an error similar to this:

- That is because the Zone doesn't exist. REMEMBER: Your zones must have already been created. Zones are Case Sensitive.
- To fix this error, click on a relationship that uses the Zone the error is referring to, in our example above, it is "Vaughan".

- Then right click, so you see this:
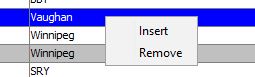
- Then select "remove"
- Repeat until all bad zones have been removed.
...