The following Article describes how to Create and Edit Users in the IDS 2 Shipping Portal.
| Info |
|---|
Please Note: The following Screen is only available to users that have Admin Privileges. Basic users cannot see this page. |
Step-by-step guide
- Click on the "Search TripsUsers" tab:


To
...
Create a New User
Step-by-step guide
...
- Clicking on part of the date to highlight either the Day, Month or Year.

- Then clicking either the up or down arrows

- Or by select the large down arrow

- Then select the date from the pop up calendar.

...
- Using the right hand side of the screen

- Select the level of Authorization for this new user, using the "Authorization" dropdown:

- The levels of Authorization are:
- User - cant see the Users and Address Tabs. They can only create, edit and search shipments.
- Admin - can see all screens in the IDS 2 Shipping Portal.
- Then enter in the User's Login ID in the Login ID field:

- Login IDs:
- can only contain numbers and letters.
- they must be a minimum of 4 characters.
- They cant contain spaces.
- They cant contain any special characters.
- You will notice that if you try to enter in a space or a special character, the software will ignore your input.
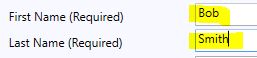
- Enter in the User's First and Last Name
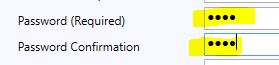
Then enter in the password into the "Password" and the "Password Confirmation" fields
- Then enter in their phone number

- Then enter in their email

- Then enter in their Cell (Mobile) phone number

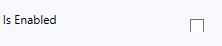
- Then tick the "Is Enabled" box

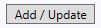
- Then click the "Add / Update" button
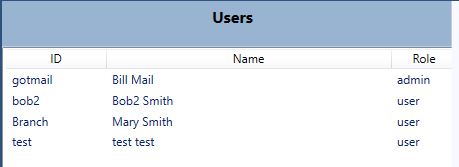
- You will then see the new user appear on the left hand side of the screen
To Edit a User
- Find the user that you would like to edit in the left hand side of the screen.
- Then double click on that user.
- Their user details will populate the fields on the right hand side of the screen.

- Then change the fields as needed.
- When you are done, click on the "Add / Update" button
To Disable a User
- Using the steps above (To Edit a User).
- Untick the "Is Enable"
- Then click on the "Add / Update" button.
To Delete a User
- Using the steps above (To Edit a User).
- Then click the "Delete" button located on the bottom left hand side of the screen

- Then click "Yes"

Related articles
| Filter by label (Content by label) | ||||||||||||||||||
|---|---|---|---|---|---|---|---|---|---|---|---|---|---|---|---|---|---|---|
|
...